Exporting a Power BI Report Page as an Image and Embedding it into a Word Document

Now, we all know that data speaks volumes, but only if we can understand its language. Power BI has been a game changer in converting complex data into insightful, visually engaging reports. But there’s more magic in the mix! Have you ever tried extracting a Power BI report into an image and embedding it into a Word document? If not, let me explain why it’s worth considering. The process adds a whole new dimension to presenting and sharing data. You see, by transforming your BI reports into images, we can insert them seamlessly into Word docs. This makes the data easily digestible, ensuring we’re all on the same page. It’s about bringing data alive in a format that’s simple, portable, and best of all, doesn’t require Power BI expertise to comprehend. It’s like bridging the gap between data nerds and the rest of us, which is a win-win, right? So, let’s dive in and find out more about this.
To get Power BI content into a Word document, follow these steps:
- Make sure that the Developer Tab has been added to the Word Toolbar
- Add an image through the Developer Tab
- Update the Properties
- Create a Power Automate Flow with a defined trigger
- Export the Power BI Report Page to an image
- Populate the Word document with the image file content
Add Developer Tab
Navigate to File > Options > Customize Ribbon > Tick the Developer toolbox
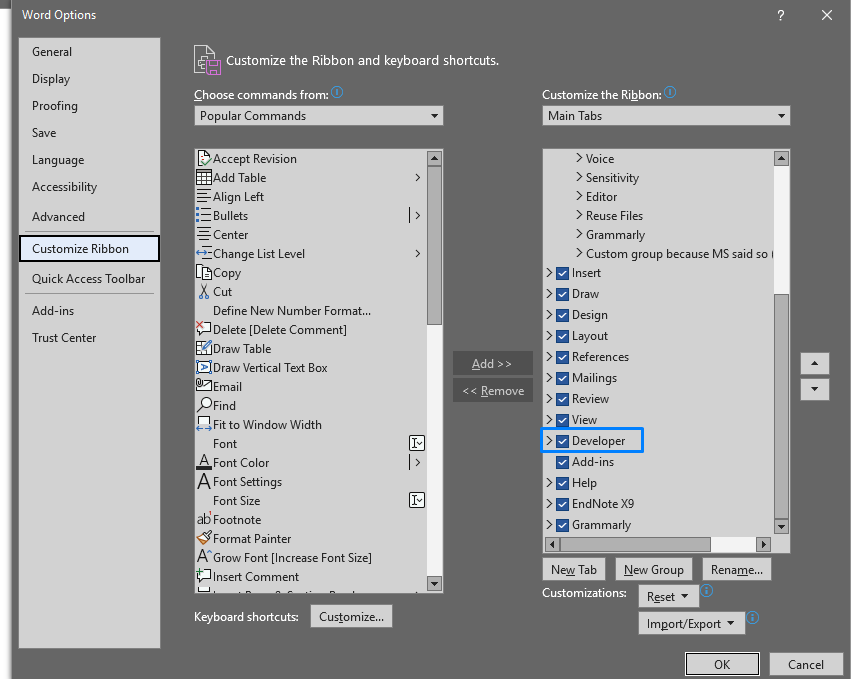
Hit “OK” and navigate to the toolbox where you should see the following:

Add Image Placeholder
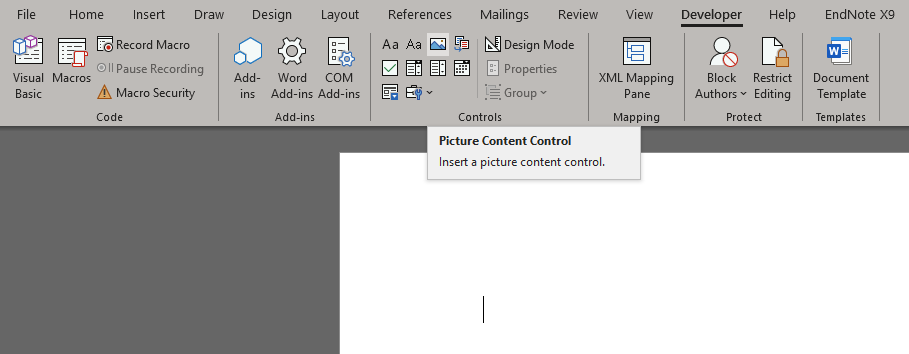
Focus the cursor on the part of the document where the image should be added. Select the Developer tab and select the Picture Content Control.
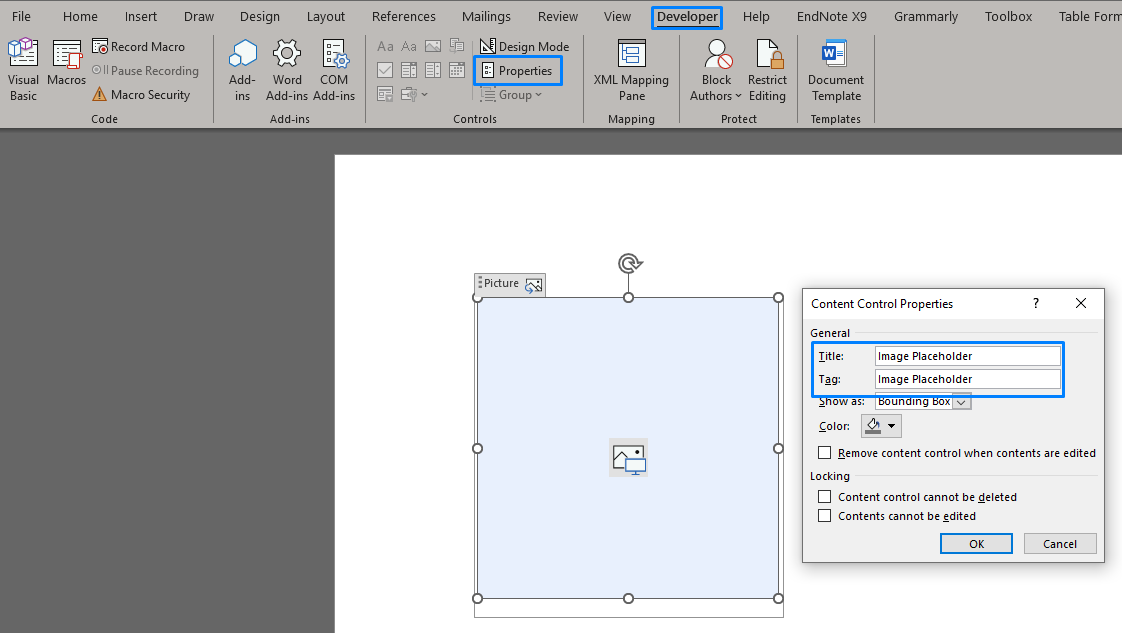
Once the image has been added, select and amend the Properties under the Controls section. Complete the Title and Tag properties:
Create Power Automate Flow
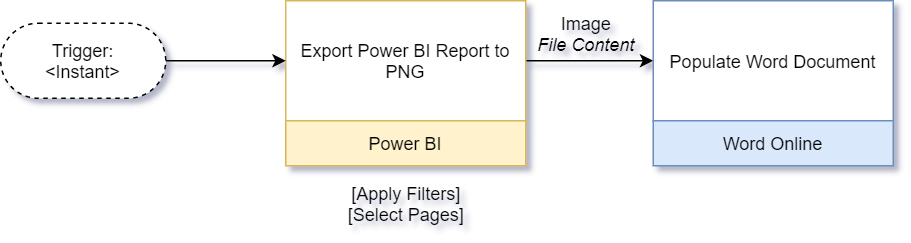
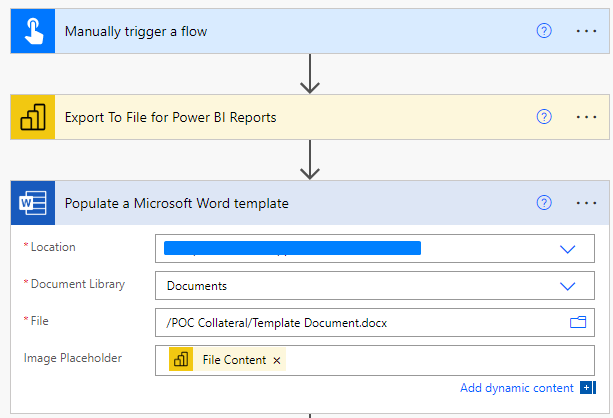
Navigate to Power Automate, then create a new instant flow (or add your required trigger). On a high-level, the flow should follow the following structure:
Export Power BI Report to Image (PNG)
Select the Power BI Workspace and Report along with the Export Format.
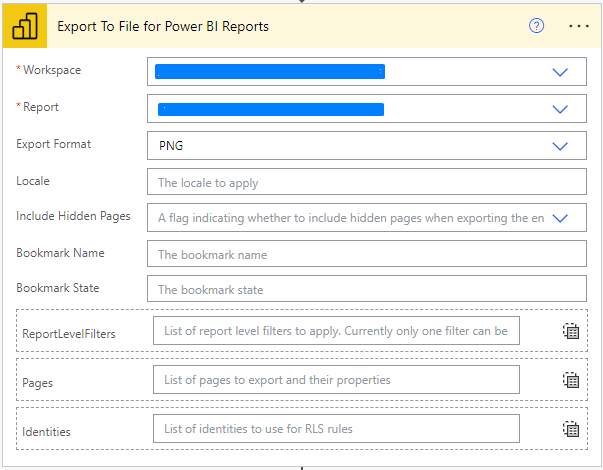
Power BI Reports are filtered using URL query parameters which are detailed in these Microsoft Docs. The structure of the query follows the following format:
<table name>/<column name> <operator> '<value>'
For example, to only include the North region from a Sales table, the filter would be:
Sales/Region eq 'North'
Populate the Word Document
Add the Populate a Microsoft Word Template action, then select the location (SharePoint, Teams or OneDrive), select the library and the file. The “Image Placeholder” will appear as the title you gave the image in the document when the picture content control was added. Assign the Power BI file content to the field.
Save and run!
Extending the Flow
Multiple Report Pages
The same approach can be used to add more than one report page (or report) to a single document:
- Add a Picture Content Control to the Word template for each image, each with its own Title and Tag
- Add an Export To File for Power BI Reports action for each page that needs to be exported
- Map the file content of each export to its corresponding image placeholder in the Populate a Microsoft Word Template action
Scheduling and Reliability
- If the flow runs on a schedule, align it with the Power BI dataset refresh schedule so that the exported image contains the latest data.
- Add exception handling around the export so that the flow lets someone know if the report could not be accessed or the export failed, rather than generating a document without the image.
- Recipients of the Word document don't need access to Power BI to see the report content, which makes this a useful way to share report snapshots with a wider audience.