Creating an Azure Blob Storage Resource and Container

Do you have files that you would like to store in Azure? Azure Blob Storage is perfect for that. Here’s the 101 on Azure Blob Storage that will be covered in this post:
- Create a Resource Group
- Create an Azure Blob Storage Account Resource
- Create a Container
- Upload Files
- Retrieve Connection Strings and Keys
Let’s take a deep dive.
Create a Resource Group
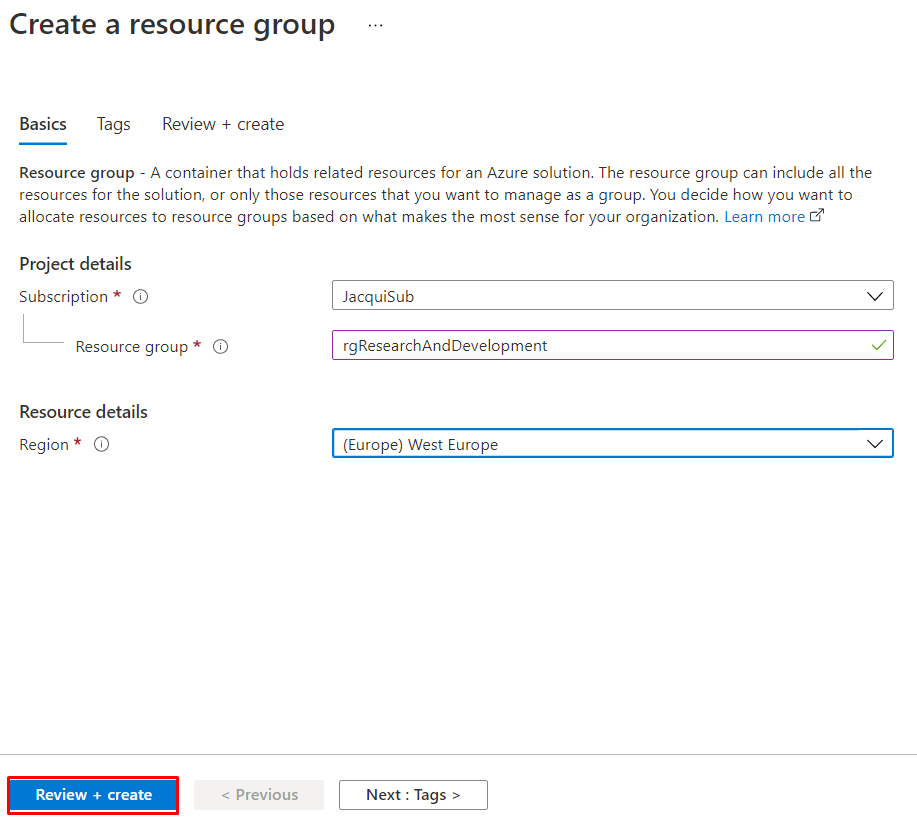
First, you should create a resource group that will group any resources related to a specific project:
Create Azure Blob Storage Account
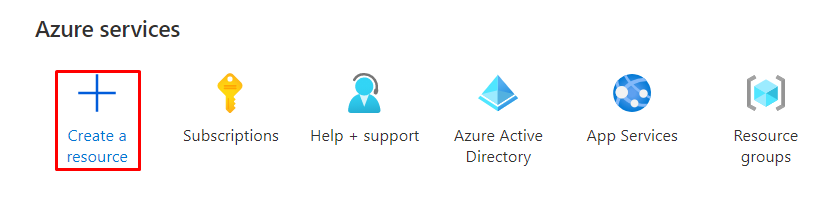
Now that we have a place to store all of our resources, let’s create some Blob Storage. Start by navigating to Home and selecting Create a resource:
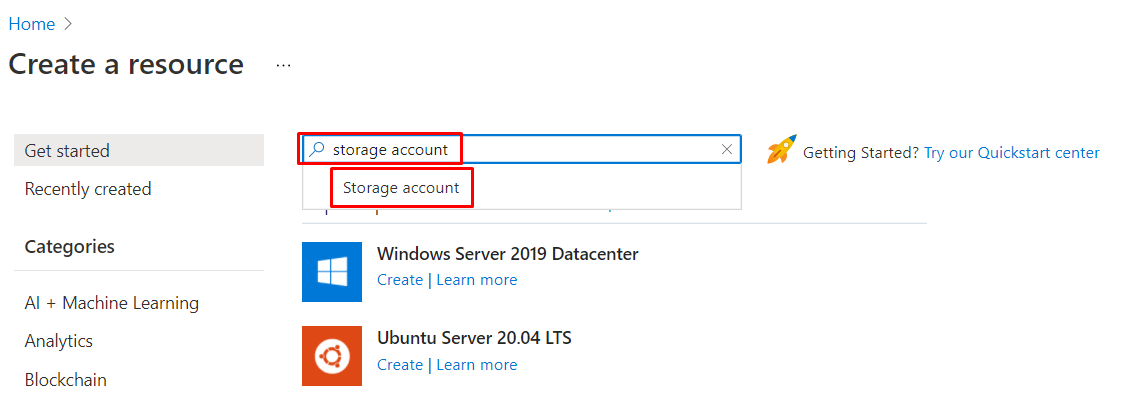
Search for storage account and click on the suggested resource named Storage account that pops up right under the search box:
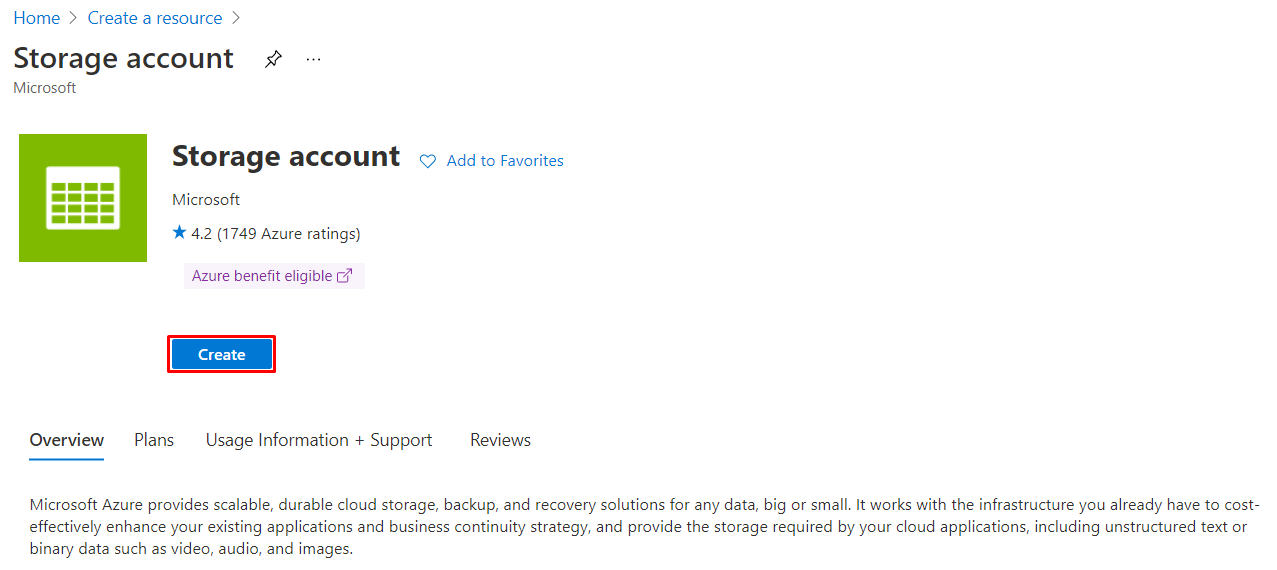
You should be navigated to the Storage Account resource with the option to Create the resource:
Ensure that the correct subscription and resource group are filled, along with the name of the storage account and the region, before clicking create + review:
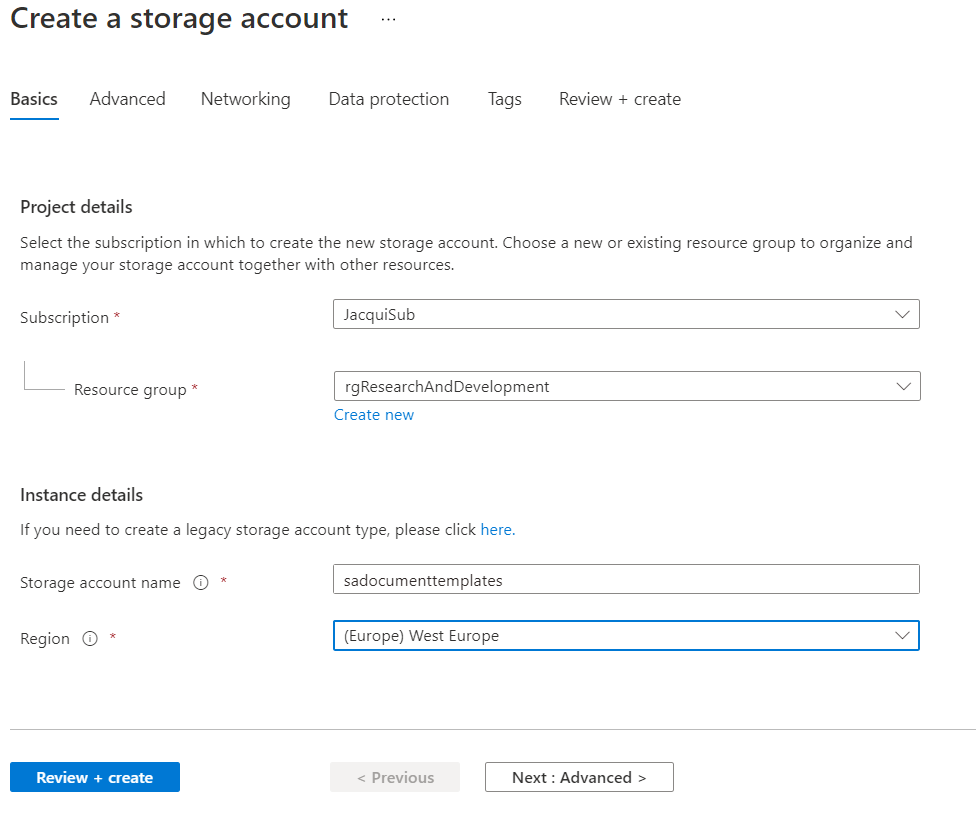
Make sure you have taken note of the information in the Advanced, Networking, Data protection and Tags tabs, before confirming the creation of the resource.
Create Container and Upload File
Navigate to the newly created storage account, select Containers and create a new container. Give the container a Name before hitting Create:
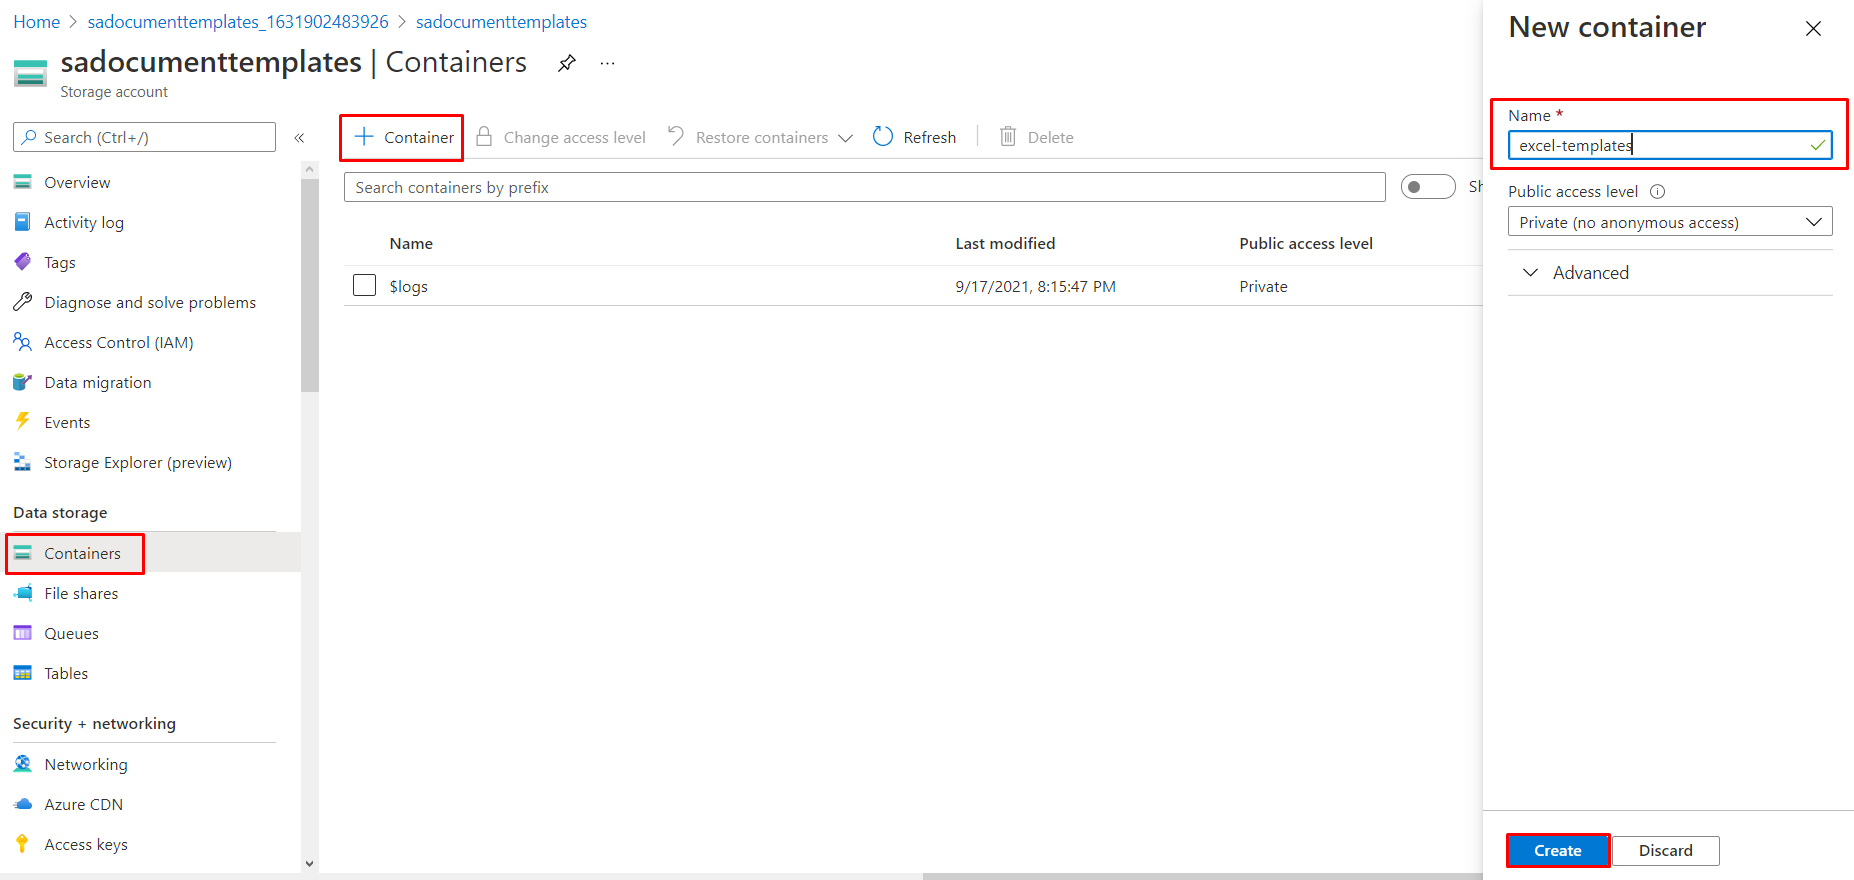
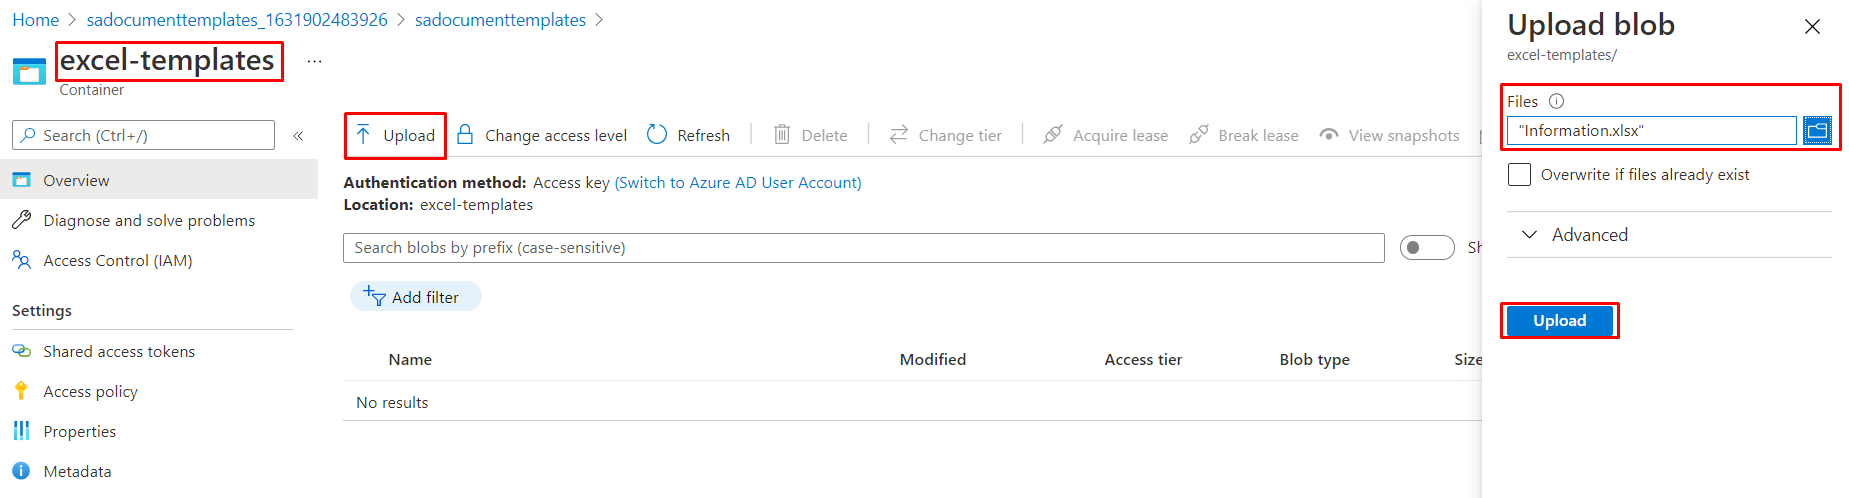
Click on the newly created container and select Upload. Navigate to the file that you would like to upload and select Upload.
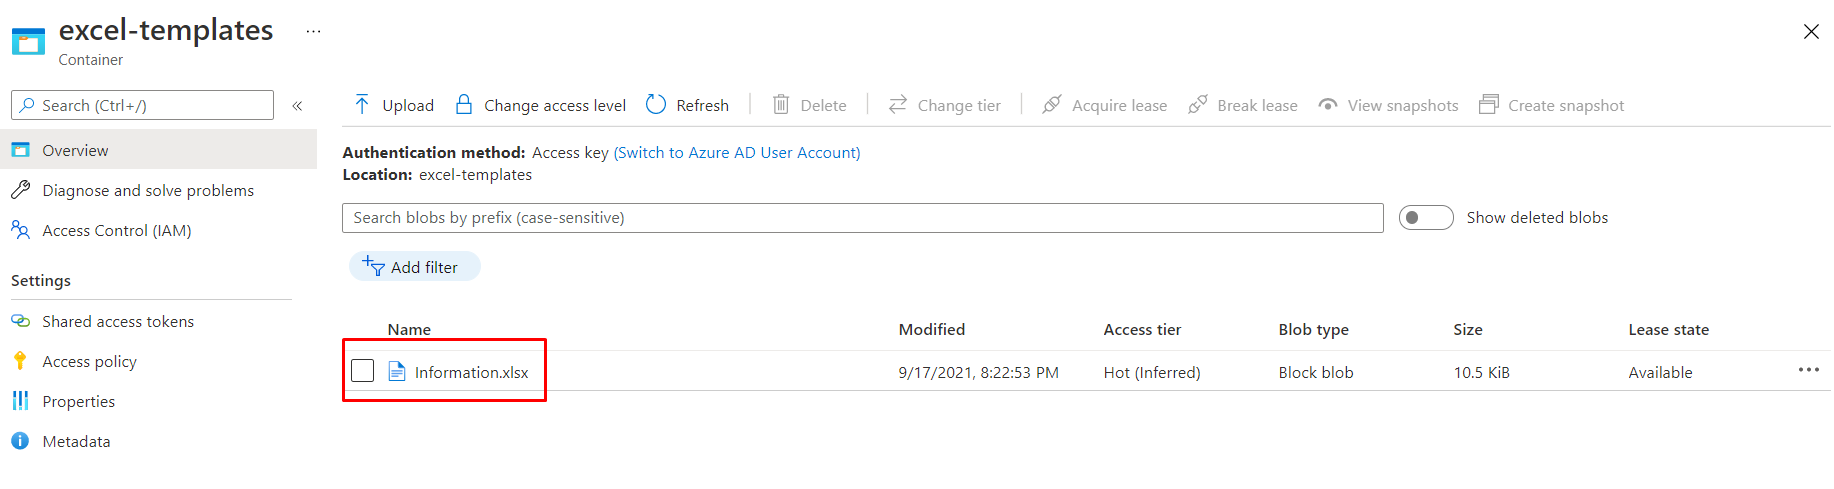
Your file should now be visible and ready for use:
Retrieve Connection String or Keys
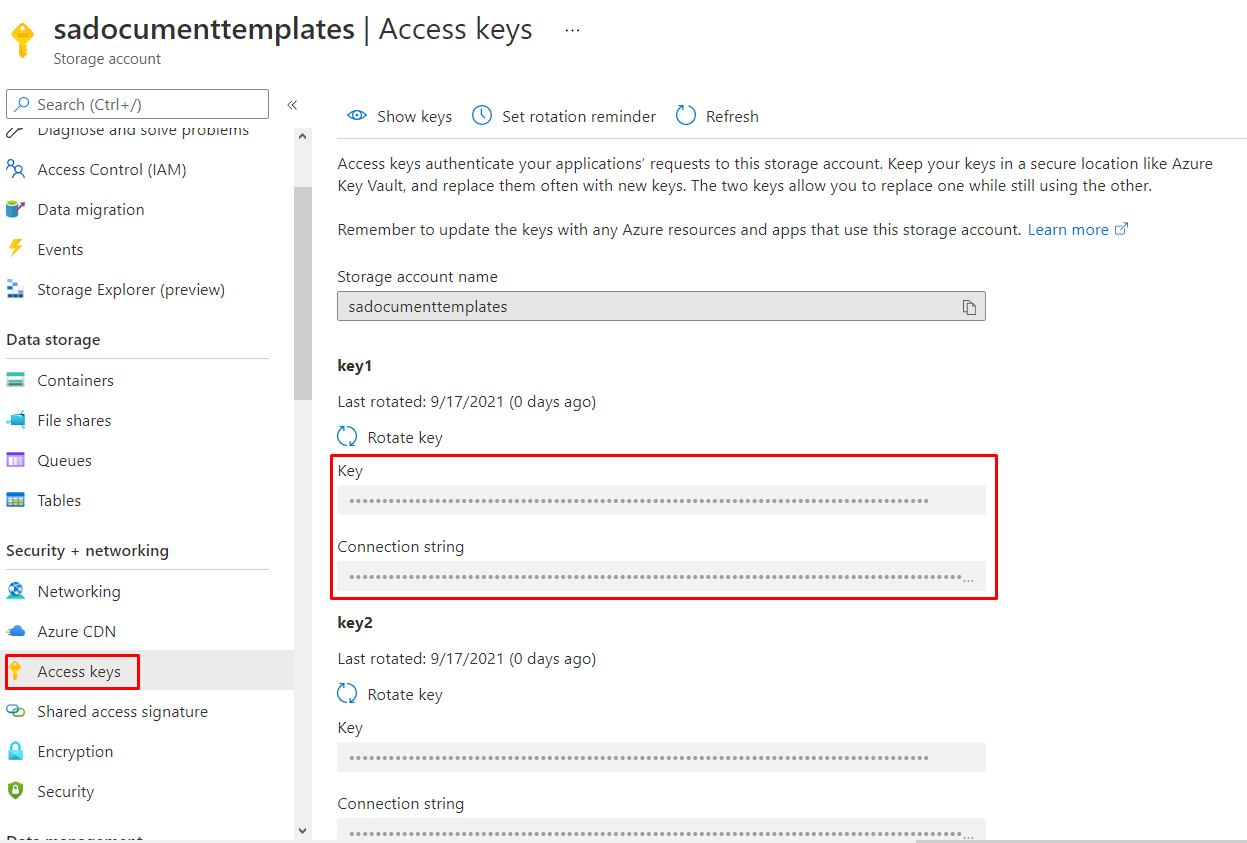
Navigate back to the Storage Account resource (make sure you aren’t in a container) then click on Access keys to find your keys and connection strings.
Did this work for you? Did you get stuck somewhere?
Feel free to email me at jacqui.jm77@gmail.com if you did or if you have cool use cases you’d like to share.