Level of Difficulty: Beginner.

This post will assist in using the Microsoft Office 365 Activity, specifically for sending emails with attachments, in UiPath.
What are the steps?
The steps that we will be following are:
- Follow the link on how to create an App Registration on Azure
- Get the Application ID and Tenant ID from Azure
- Install the UiPath.MicrosoftOffice365.Activities library
- Add a “Microsoft Office 365 Scope” Activity
- Configure the “Microsoft Office 365 Scope” activity
- Add a “Send Mail” Activity
- Configure the activity
- Add an “Assign” Activity
- Assign the files in the directory to a variable
- Add an “Assign” Activity
- Assign the converted attachments variable to IEnumerable<String>
- Add IEnumerable<String> variable to the “Send Mail” activity’s AttachmentCollections property
Deep Dive
Let’s dive deeper into the steps listed above.
Getting the Application ID From Azure
Once you have logged into Azure (https://portal.azure.com/), go into the Azure Active Directory:

Select App registrations and then search for your application. Click on your application when it appears.
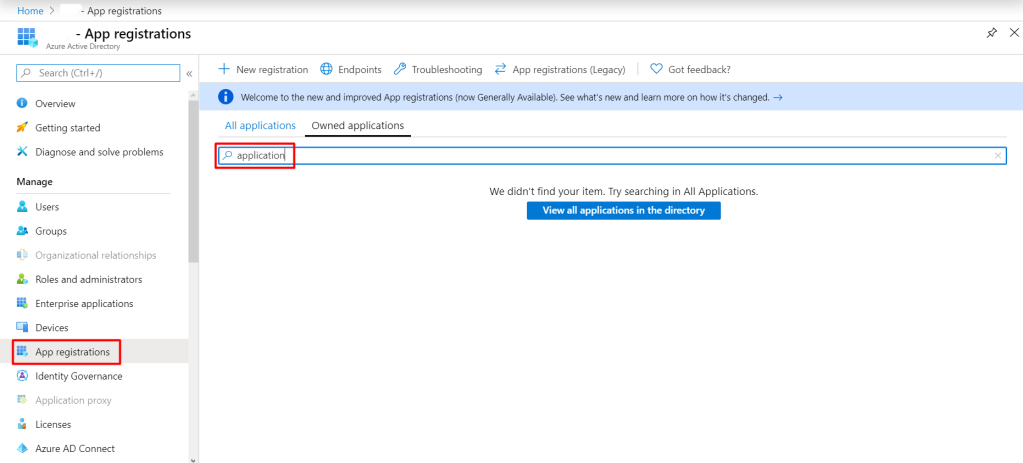
Copy the Application ID and the Tenant ID and keep it for later use, when configuring the Microsoft Office 365 Scope:

Now that we have our info from Azure, let’s get started in UiPath.
Install the UiPath.MicrosoftOffice365.Activities library
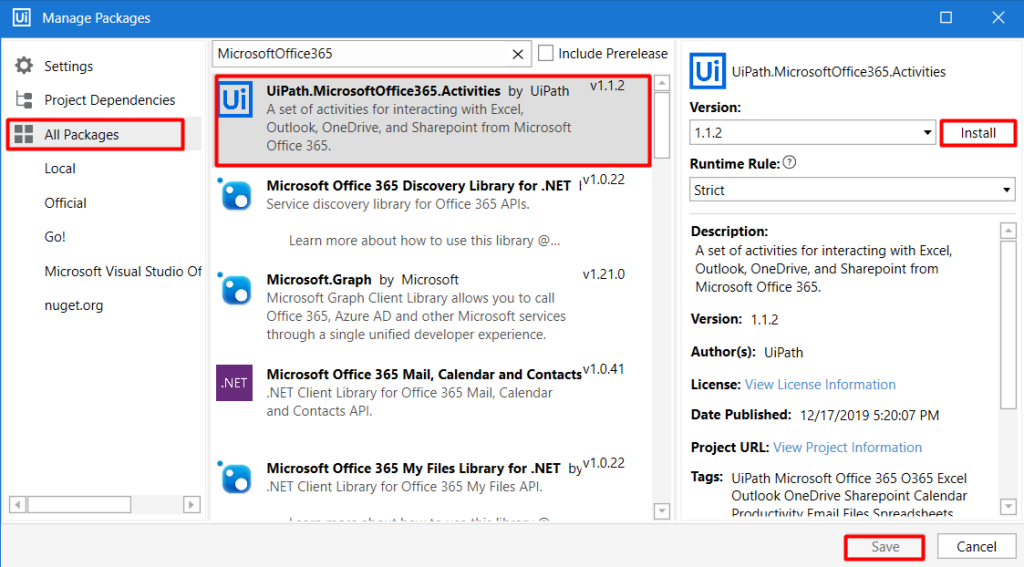
Create a new UiPath Process, add a sequence to the Main.xaml file and click “Manage Packages” as seen below:

Ensure that focus is on “All Packages” when searching for UiPath.MicrosoftOffice365.Activities.
Select the UiPath.MicrosoftOffice365.Activities library and click on the Install button. After clicking the install button, click on Save and Accept when prompted:
Now that we have the library installed, we can wire our process up to use the MS O365 capability.
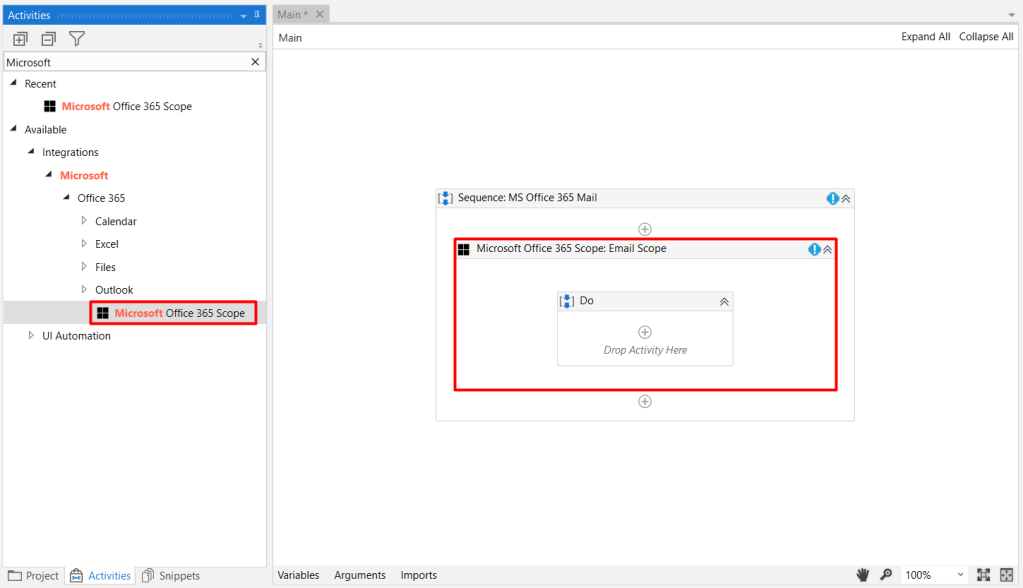
Add a “Microsoft Office 365 Scope” Activity
Search for “Microsoft” in the Activities panel and drag the “Microsoft Office 365 Scope” over into the Sequence sitting in the Main.xaml file:
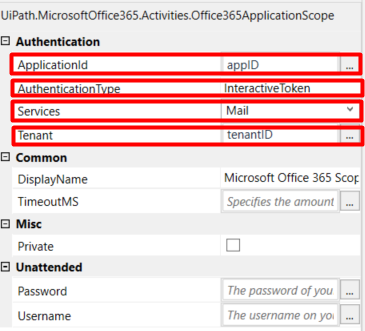
Configure “Microsoft Office 365 Scope” Activity
Ensure that you configure the following properties correctly:
- Application ID: Application ID obtained from Azure
- Authentication: Interactive token should be the default and easiest to use, however, it would depend on the security level that is applied to your user on the app registration
- Services: For sending and reading mails, the Mail service should be selected
- Tenant ID: Tenant ID obtained from Azure
In the activity pane, find the “Send Mail” activity (Integrations > Office 365 > Outlook) and drag it into the Microsoft Office 365 Scope:
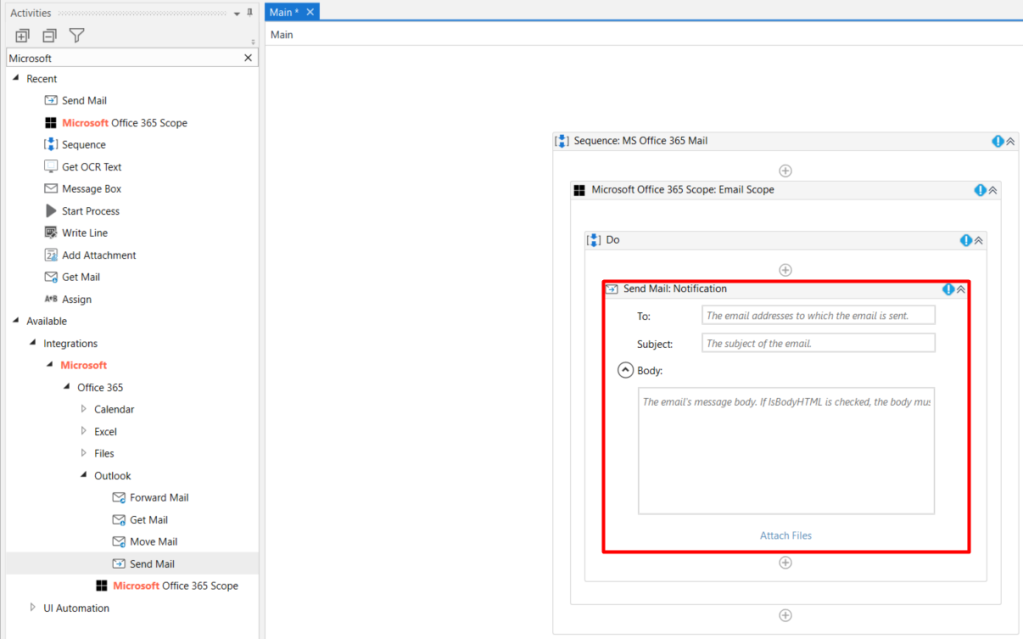
Configure the Send Mail properties as follows:
- Body: The text that should be included in the email body
- Subject: The subject that should appear in the email subject
- From: The email address that the mail should be sent from
- To: The email address (or email addresses) that the mail should be sent to
- AttachmentsCollection:
- {} if there are no attachments
- IEnumerable String variable that contains the paths of the attachments if there are attachments
The other properties may be configured and adjusted as necessary.
Adding Attachments From Folder
In a case where there are files in a folder that need to be attached, add an “Assign” activity. Create a variable (of Type String[]) named attachments and use the assign activity to assign it to System.IO.Directory.GetFiles(“\Attachments”)
Since the Send Mail activity accepts the attachments collection as the IEnumerable<String> type, the attachments variable needs to be converted from an array of string to an IEnumerable of string. This can be done by grabbing another “Assign” activity and using it to assign a new variable, named attachmentEnumerable (of type IEnumerable<String>) to attachments.AsEnumerable().
Now add the attachmentEnumerable variable to the AttachmentsCollection property of the “Send Mail” activity.

The final process should look like this:

And that’s it folks! Give it a run and feel free to drop a comment about how it turns out.
The above solution is available at on Github
If you have any questions, issues or feedback, drop a comment below or reach out to jacqui.jm77@gmail.com

well explained step by step.
do you have something similar to work on SharePoint ?
LikeLike
Hi ajit. Not yet. Is there a specific use case? I’d be more than happy to create a post for it.
LikeLike
Getting error when assigning attachment to system.IO.Directory(“”) as cannot assign from type System.String[] to “System.String” in Assign activity.
Attachment variable is of type String.
Also, when I type email address in To: “something.something.org” it throws error and same with body and subject.
Please advice.
LikeLike
Hi there. Thanks for reaching out.
For the ‘To’ field, try enclosing it with “{}” – {“something@something.org”, “something@something1.org”}
What is the type of the variable you are trying to assign system.IO.Directory(“”) to? Could you provide a screenshot, please?
When assigning the subject and body, string variables should work.
LikeLike
The variable(name->mailAttachment) is of type String.
LikeLike
mailAttachment should not be of type String, it should either be an array, list or IEnumerable. Of type array (String[]) should work in this case.
LikeLike
Is this for Attended RDA or Unattended RPA…?
“Follow the link on how to create an App Registration on Azure”….I do not see a Link anywhere..?
LikeLike
Hi Scott I hope you are well. This is for unattended RPA but can be used for attended as well if you wanted. It really depends on the use case. Please scroll further down in the post to find the link (https://portal.azure.com/) and steps to creating an App Reg.
LikeLike