Publishing Test Cases From UiPath Studio to UiPath Test Manager

This post assumes that the background information and pre-work has already been done. The pre-work mainly refers to the understanding of the business problem, the identification of test cases and unit tests as well as the development of the test cases and unit tests.
A two-part series was released on the UiPath Community blog detailing the use of Test Driven Development (TDD) as an approach to development, specifically in the RPA context. The series is comprised of:
Before Getting Started
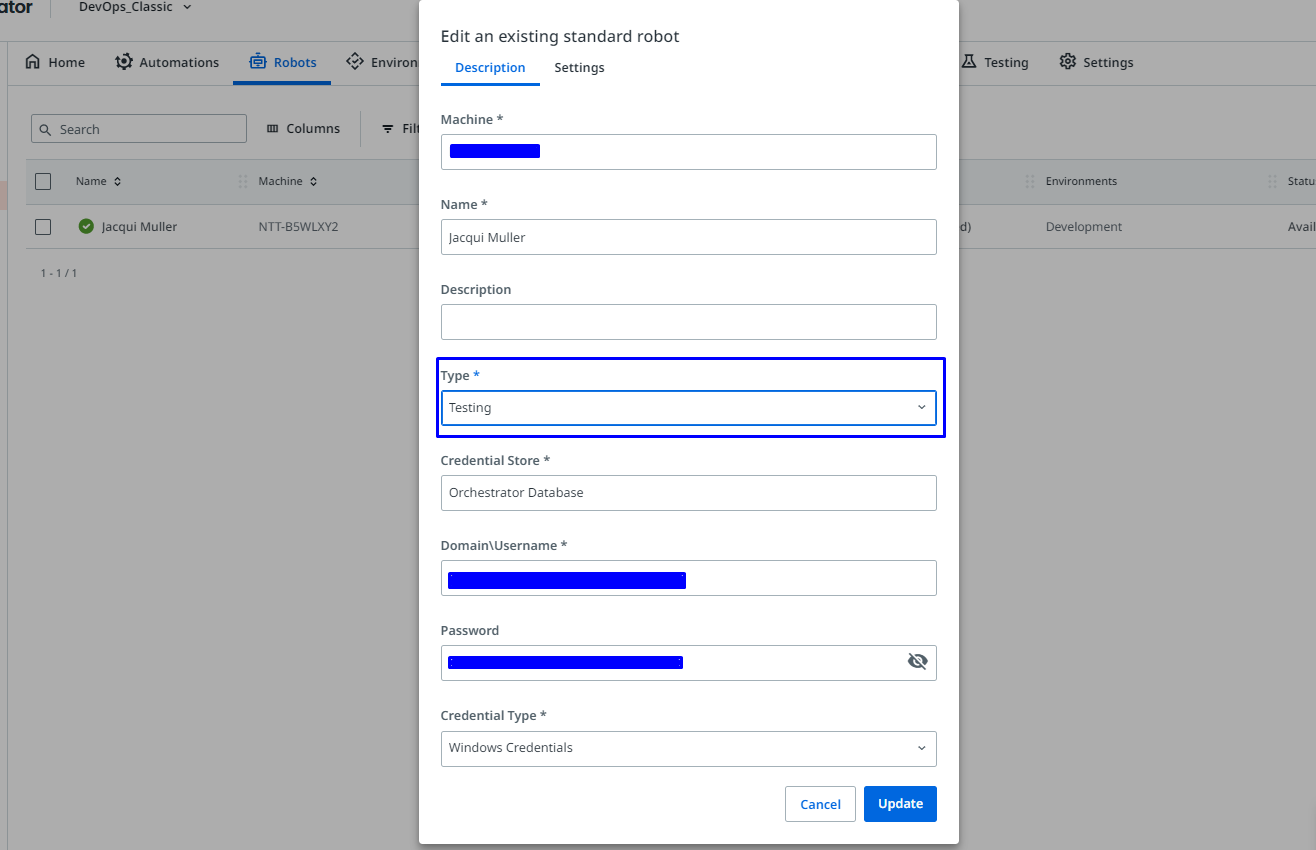
Make sure that you have a testing robot available in your environment. You can assign a robot a type of Testing in which case it will only run test cases. Having no test robots assigned within your environment, a ‘pending’ status for your test case execution will keep occurring.
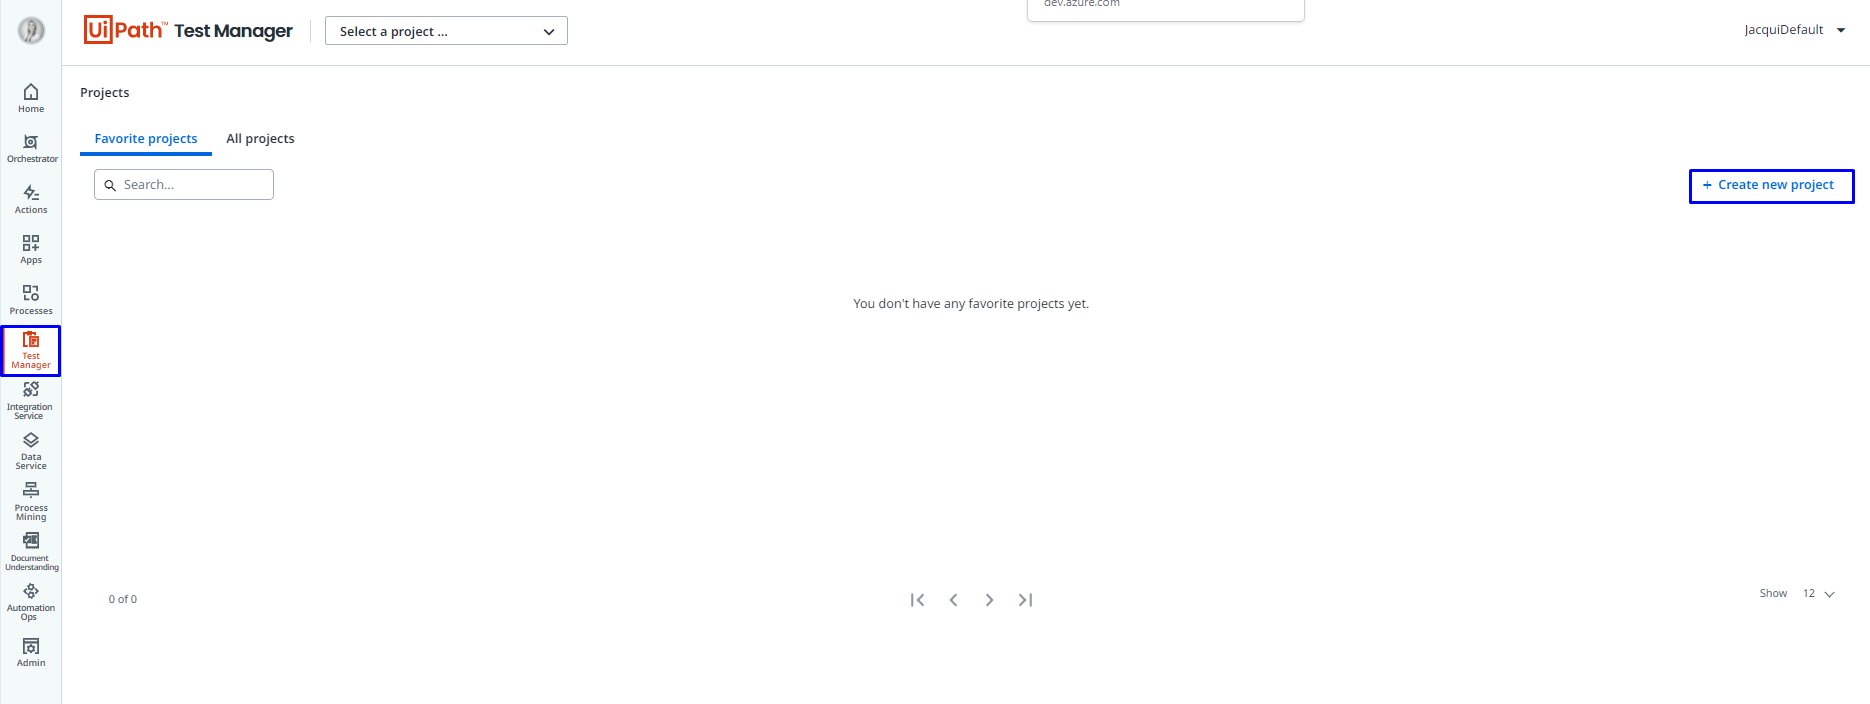
Creating a Project in Test Manager on the UiPath Orchestrator
Navigate to the Test Manager in the orchestrator and click Create New Project.
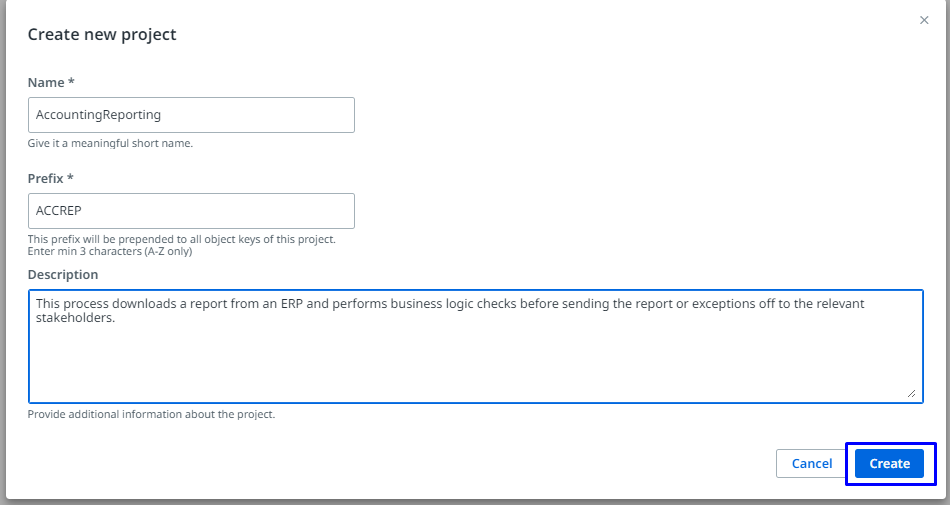
Add the Name, Prefix and Description before hitting create.
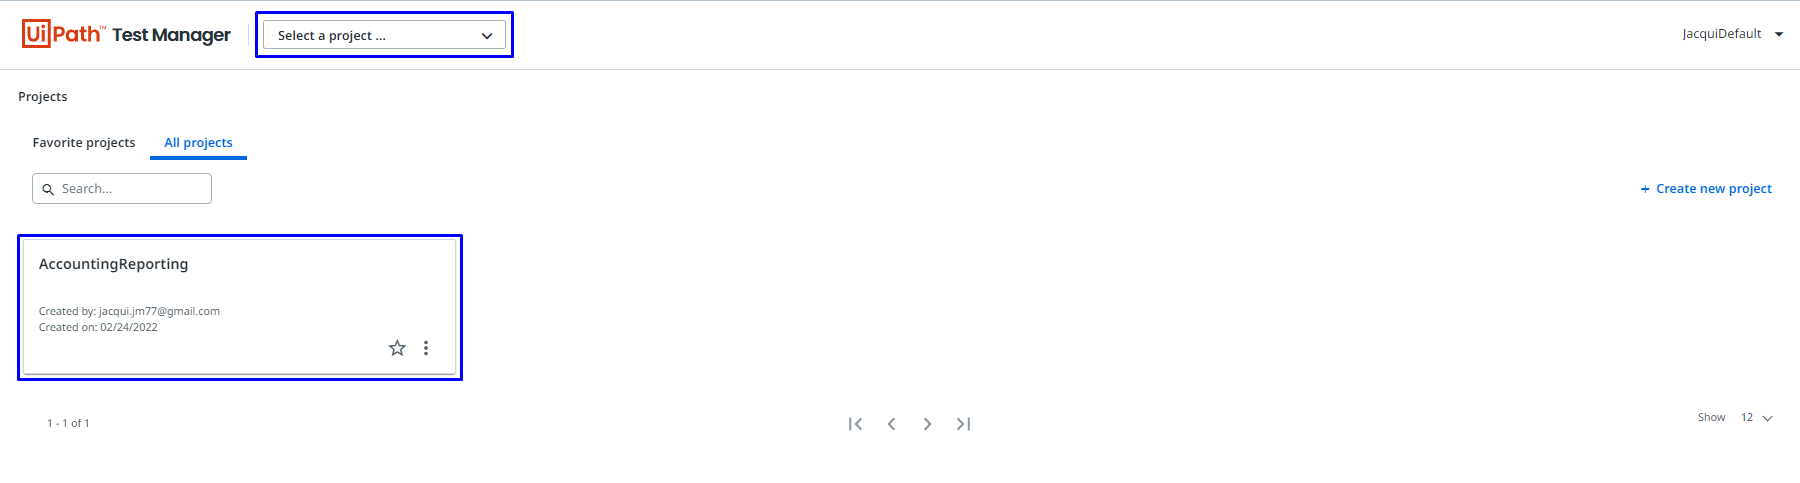
Once the project has been created, you can select it either by clicking on the Select Project dropdown and selecting the project or by clicking on the project under All Projects.
Now that we’ve set up the test manager, we need to connect it to UiPath Studio
Connecting UiPath Test Manager to UiPath Studio
You’ll need to start by getting the test manager base URL. You can retrieve the URL by navigating to Test Manager on the orchestrator and copying the URL selected below (make sure to exclude /projects):
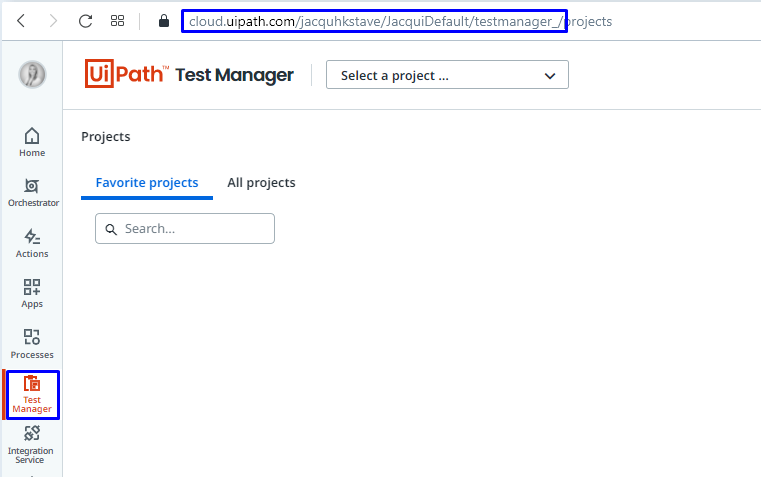
Navigate back to UiPath Studio. Select Test Manager in the task bar and click on Test Manager Settings:
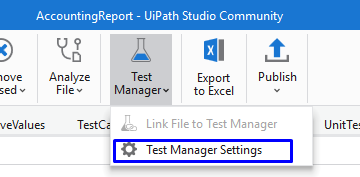
Now paste the URL and select the project you’ve created on the Test Manager.
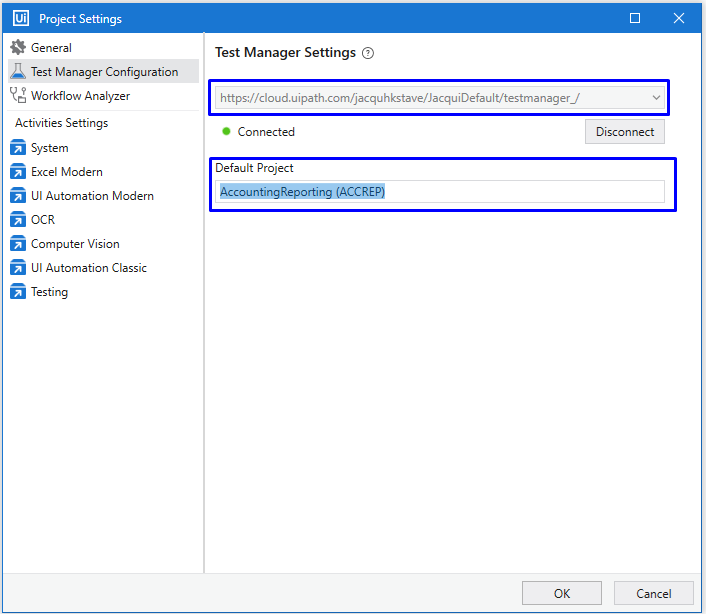
Next, let’s prepare the test cases for publishing.
Setting Test Cases as Publishable
In order to get the test cases from UiPath Studio to the Test Manager on the orchestrator, the test cases would need to be Set as Publishable.
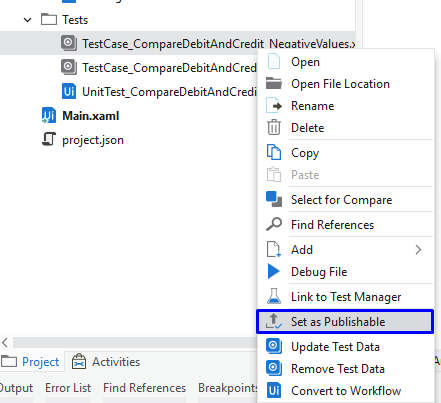
Now we can link test cases to the test manager
Link Test Cases to the Test Manager
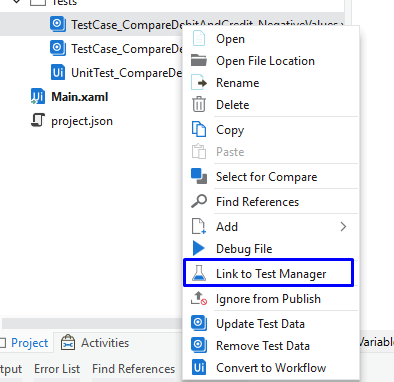
Each test case needs to be linked to the Test Manager which can be done by right clicking on the test case and selecting the option to Link to Test Manager:
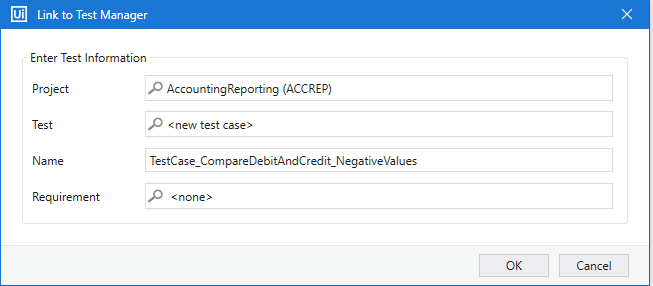
Confirm the prepopulated information before selecting okay.
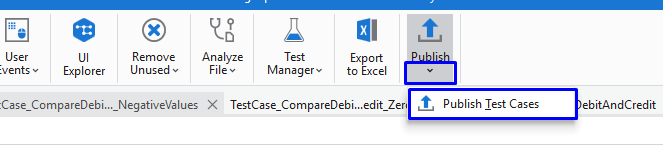
Don’t forget to Publish your test cases:
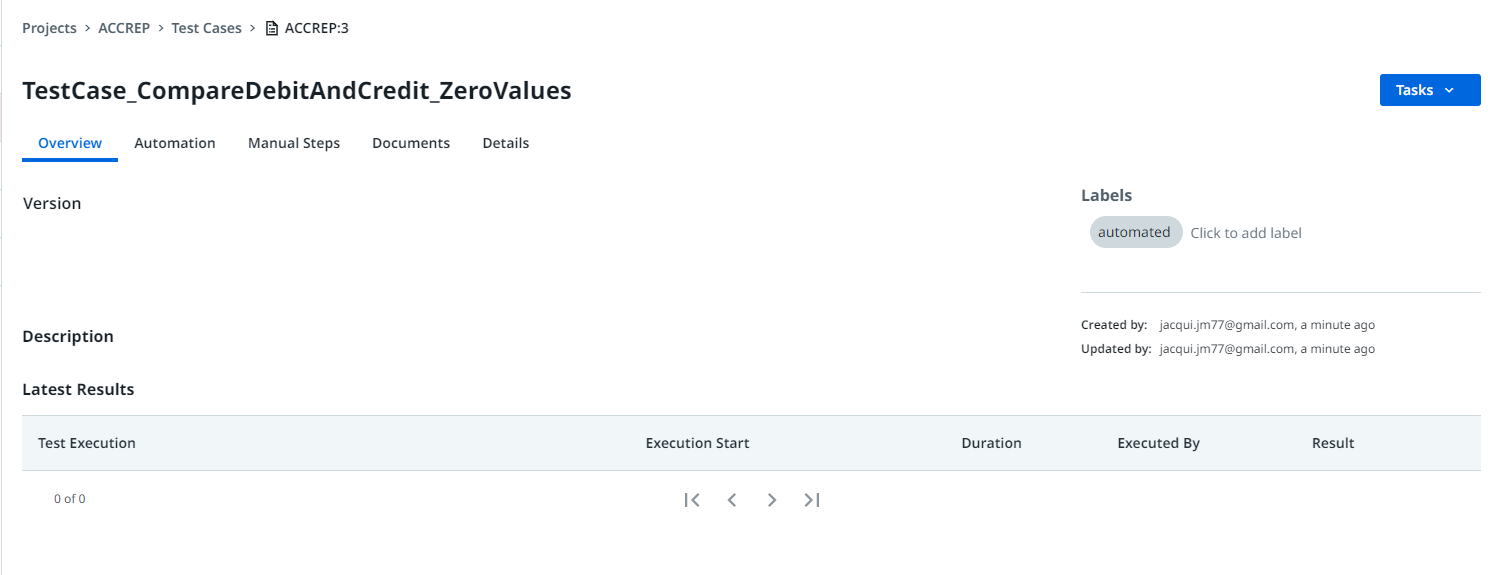
When you navigate to the Test Manager on the Automation Cloud, you should see the two new linked use cases.
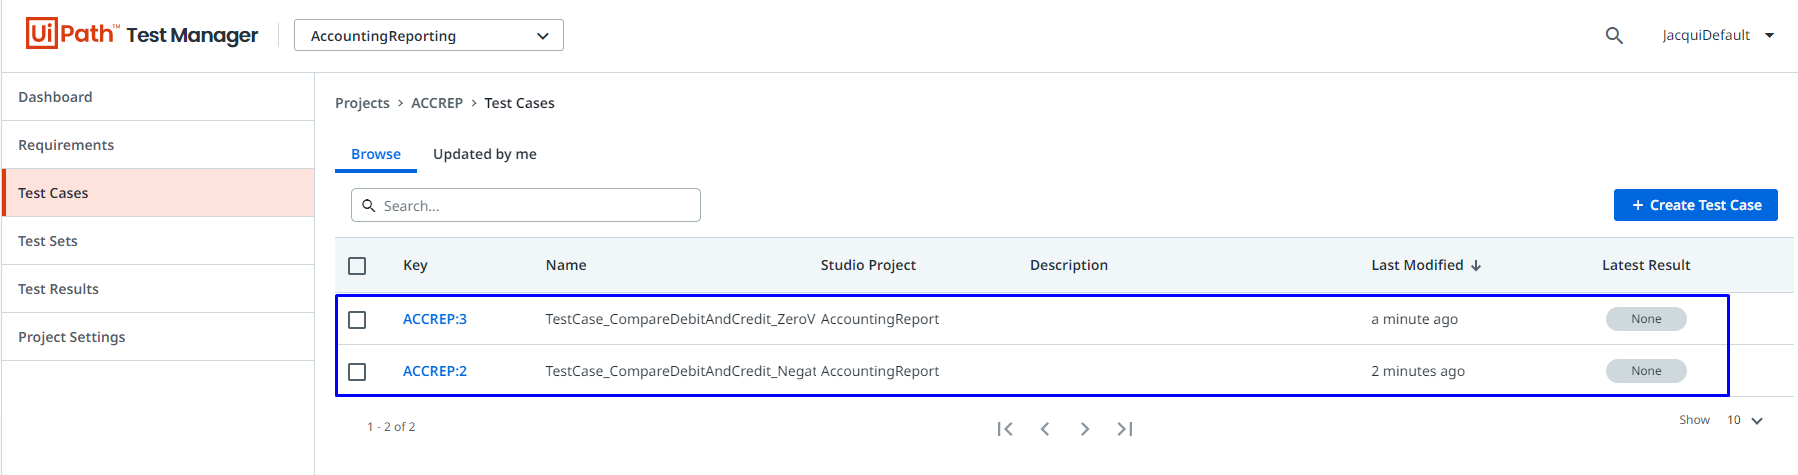
You can open the test cases by clicking on them from within the Test Manager:
Now let’s try running a use case
Running a Test Case
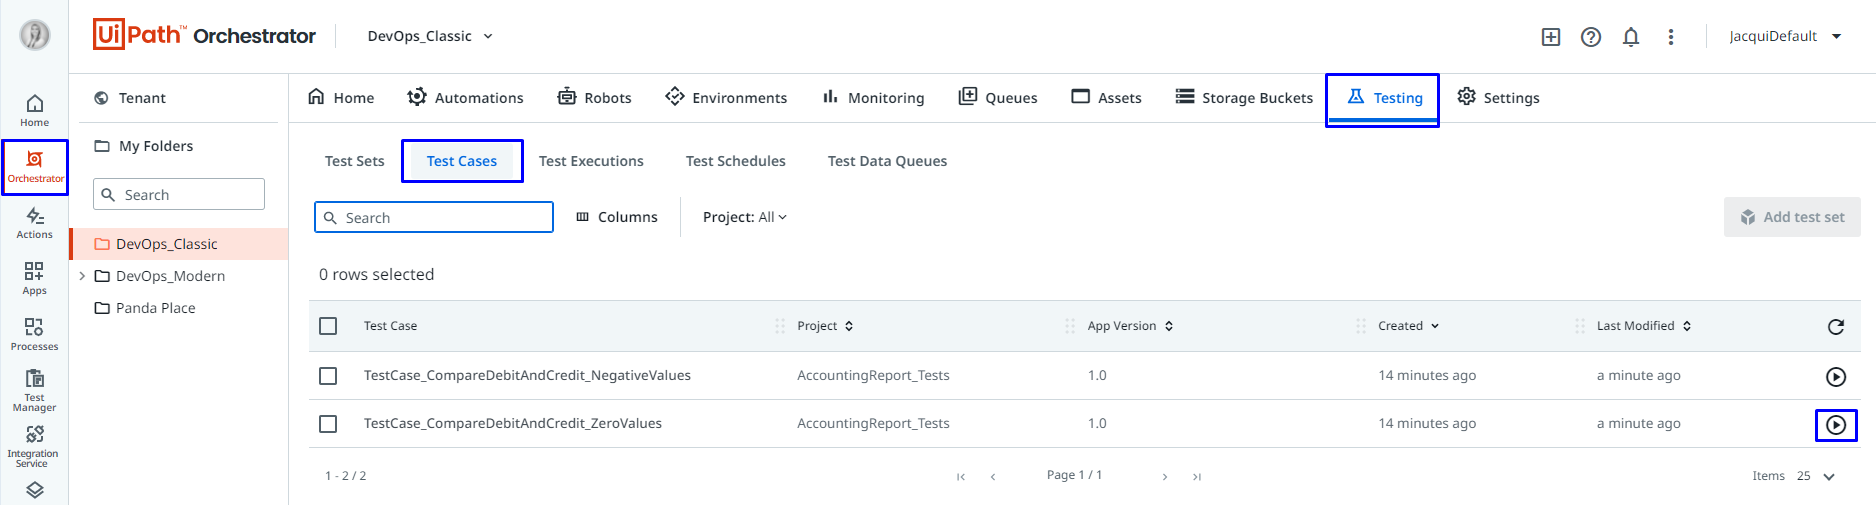
You can run a test case by navigating to the Orchestrator. Then select Testing and click on the Test Cases tab. Now click on the Run icon next to the test case you want to run:
You can group test cases together using a test set.
Creating a Test Set
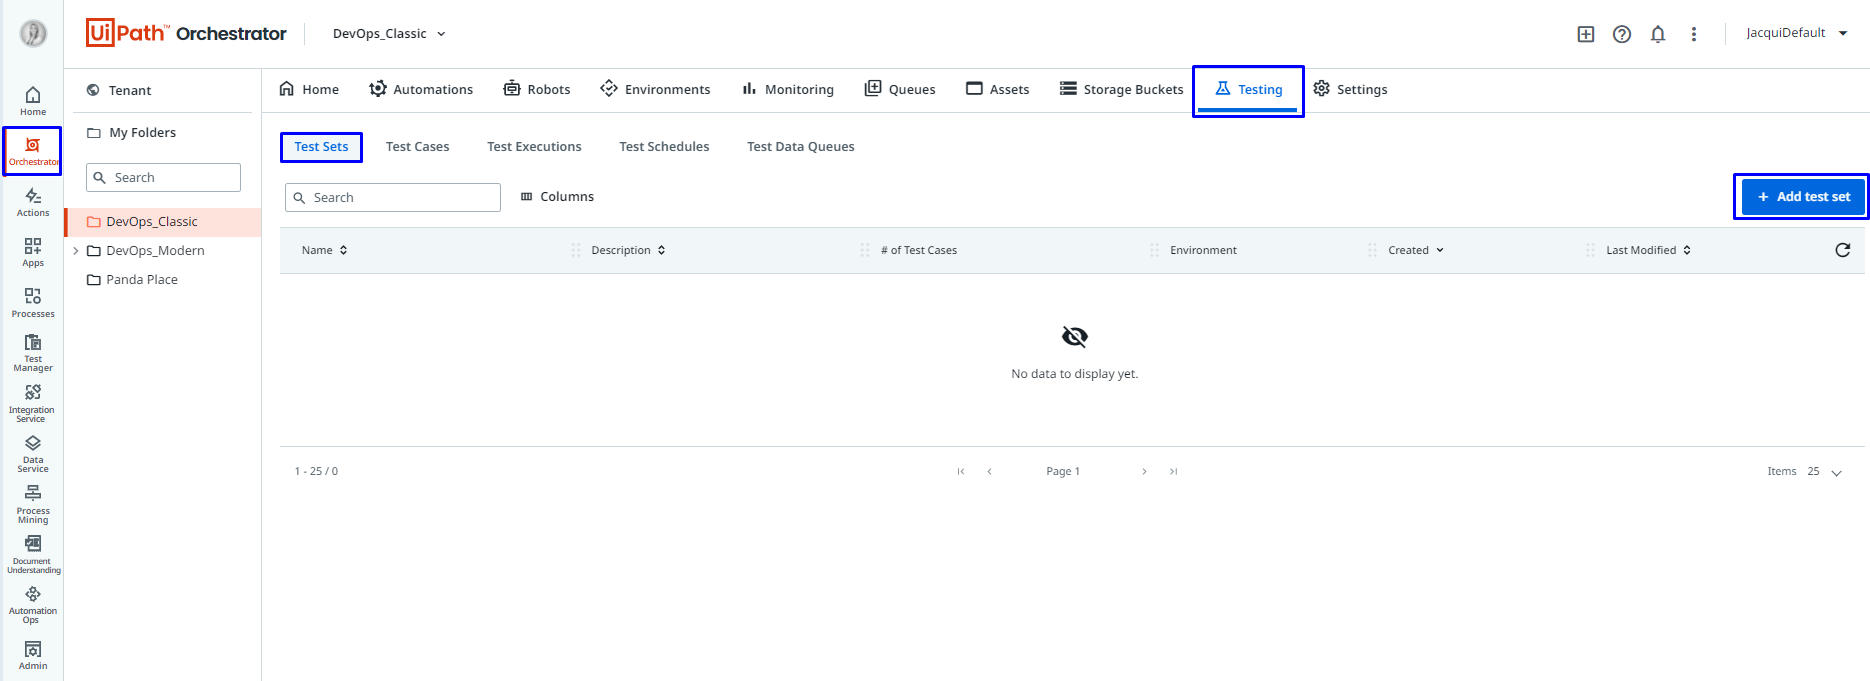
To create a test set, navigate to the Orchestrator then select Testing and click on the Test Sets tab. Click New Test Set:
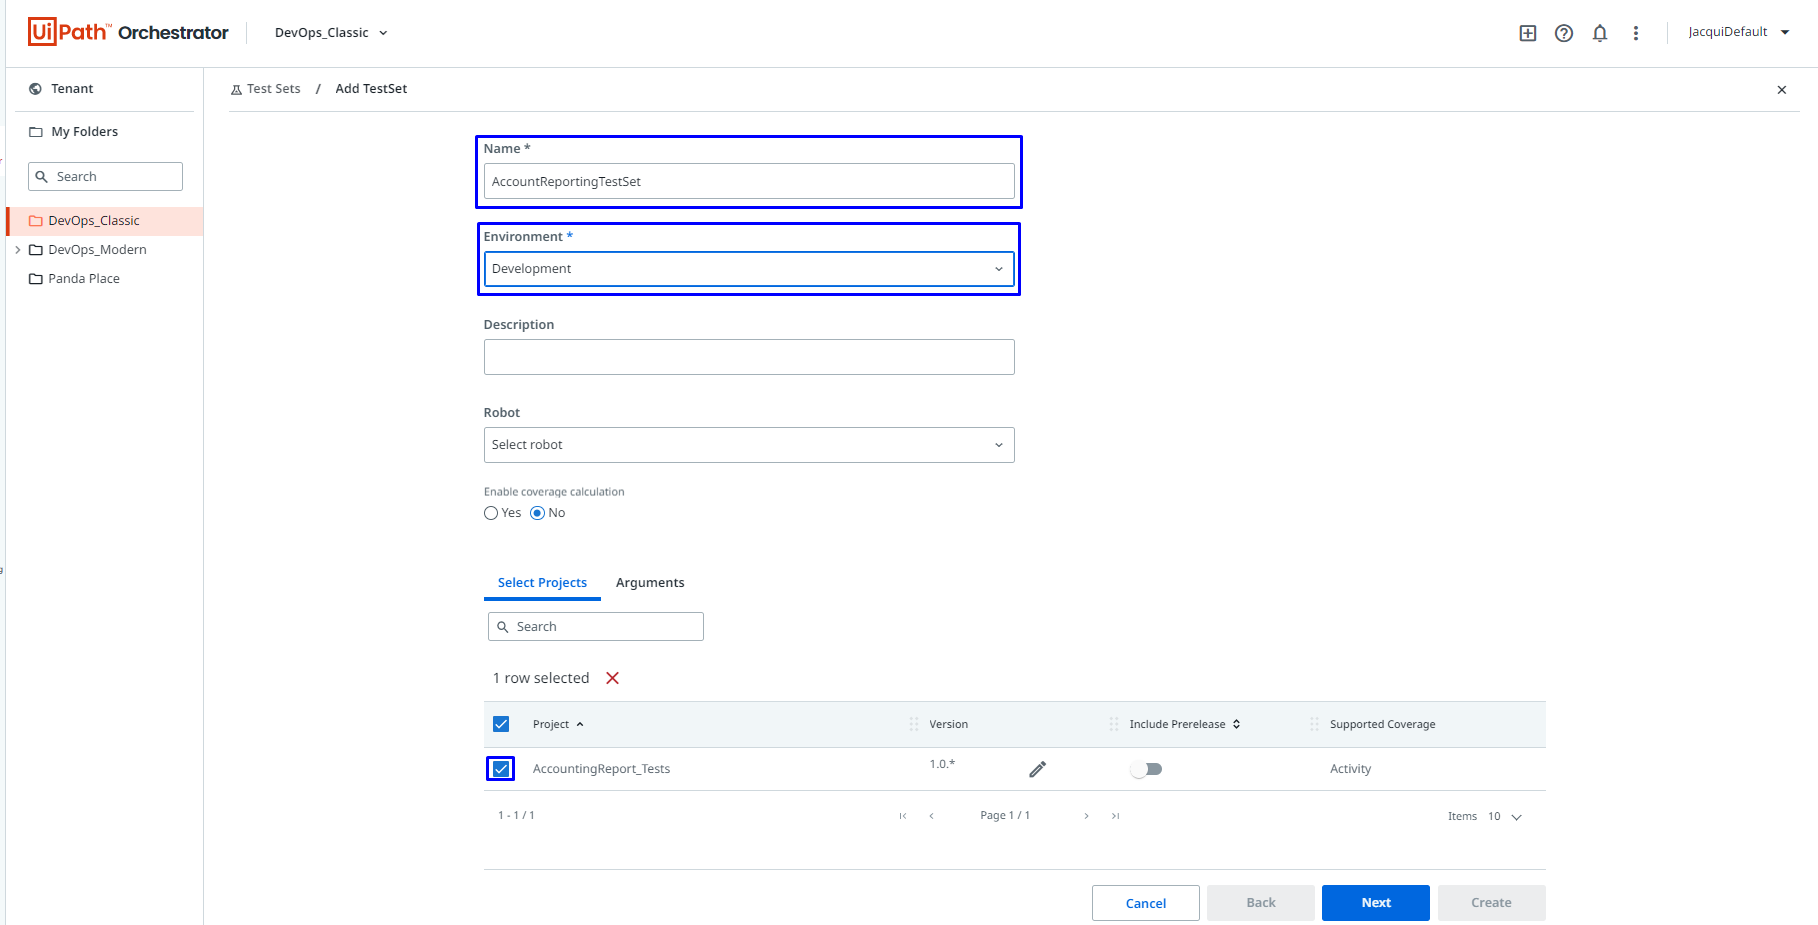
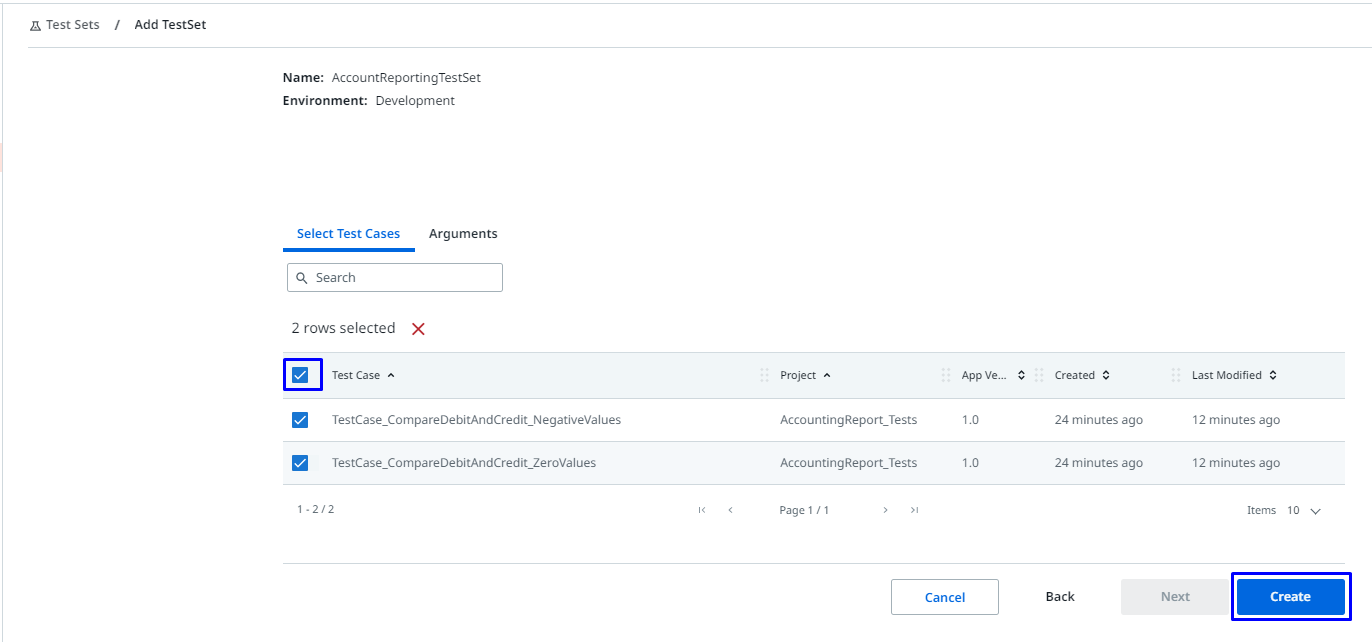
Now enter the Name and Environment, select the Project and hit Next.
Select the Test Cases that you want to group and click Create.
Now that a test set has been created, let’s see how you’d run a test set.
Running a Test Set
Similar to running test cases, you can click on the Run icon next to the set you would like to execute.

Now let’s monitor the test case progress.
Monitoring Test Case/Set Statuses
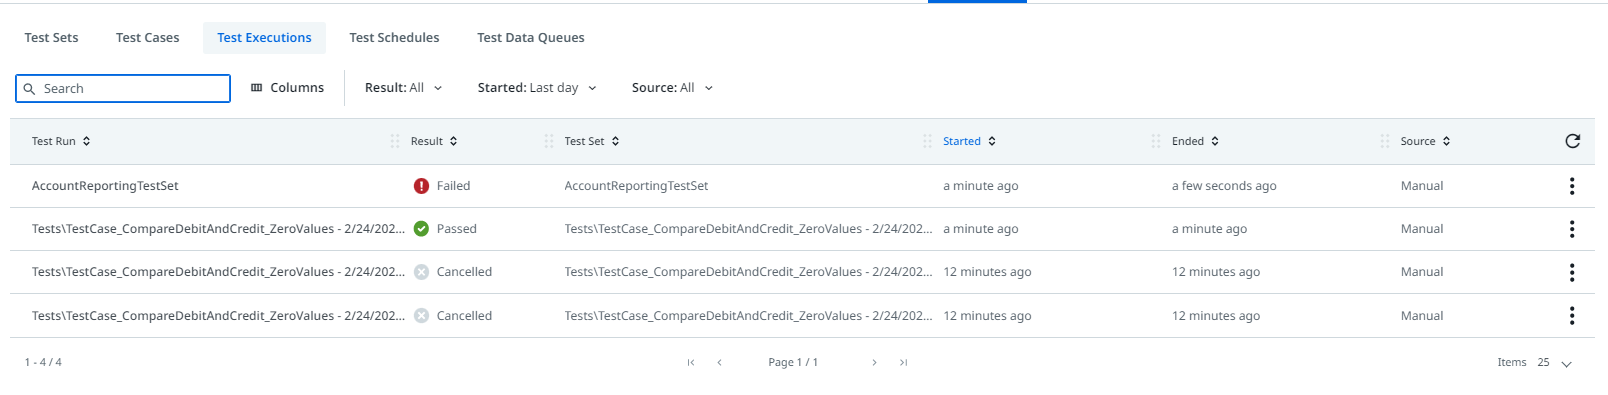
Under Test Execution which can be located under the Testing tab in the Orchestrator section, you can see the result of all test case and test set runs/executions.
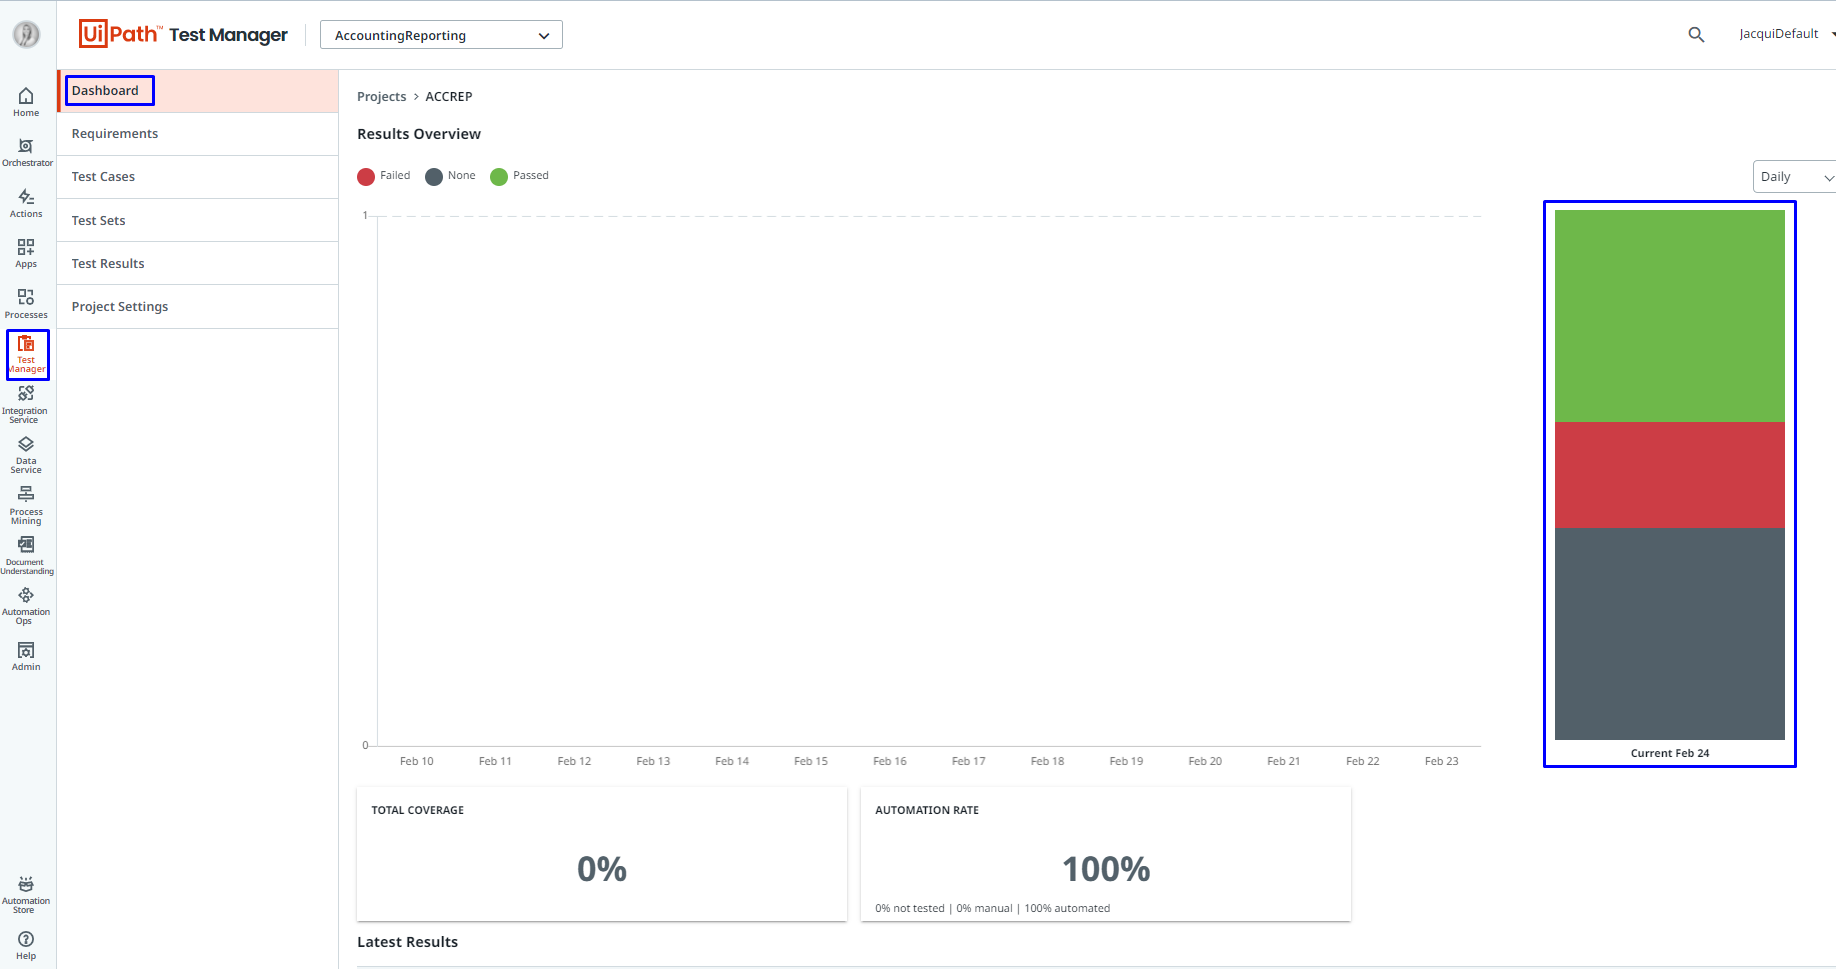
This can also be visualised by navigating to the Dashboard under the Test Manager, which will visualise all test execution results.
Did this help you? Feel free to reach out at jacqui.jm77@gmail.com.